
Securing the Internet and your Computer
Monsoon's 2.1 PC Speakers Review
Acer 2200/2203LCi Laptop Review
Zalman Theatre 5.1 Headphone Review
Creative Zen Micro MP3 player Review
Samsung's CLP300 Colour Laser printer Review
Canon 8400F Photo Scanner Review
Canon Selphy CP510 Photo Printer Review
Windows Vista x86 and x64 versions should we upgrade?
SilverStone GD01MX HTPC Case Review
Corsair Survivor GT 8GB USB Flash Drive Review
Mio P550 Digiwalker
GPS PDA Review
Recode DVD's to H.264 with AAC 5.1
Guide to Install OS X 'Leopard' on a PC
Guide to install OS X 'Snow Leopard' PC
AVerTV Hybrid Volar MAX Review
I ran into my first DVD with the 'New' copy protection, the latest version of DVD Decrypter knows how to handle it, its basically bad/dummy sectors and structure protection. When you are using DVD Shrink it will either crash or report an error, if this occurs just use DVD Decrypter to decrypt the whole DVD to the hard-drive and then use the 'Open Files' option in DVD Shrink to perform any changes before writing it to DVD. For a guide on using DVD Decrypter Click Here
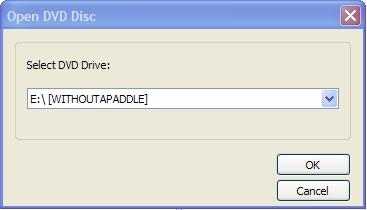
Start up DVD Shrink and click the 'Open Disc' button.

You should see the dialogue box below, select the drive that contains the DVD you want to open.
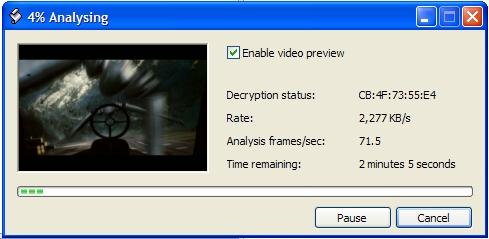
Once you've selected the drive, DVD Shrink will scan for the DVD for the contents and display a progress bar like the photo below.
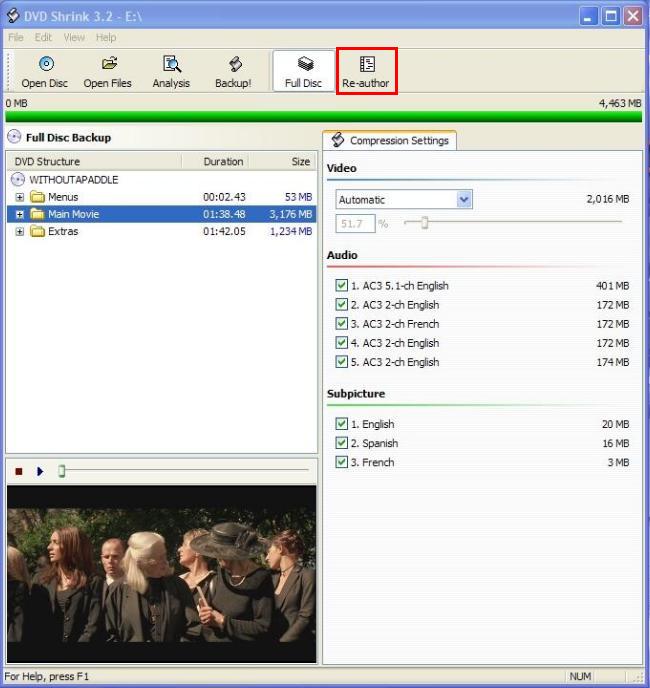
After the DVD contents have been fully scanned you should see something that looks like the photo below. If you intend on making a complete 1:1 copy then skip to the settings section, most of you will want to click the 'Re-author' button in order to remove the unwanted elements from the DVD back-up.
If DVD Shrink stops or reports any errors during this stage you may need to clean the disk or it may contain the 'New' copy protection system that needs to be removed using DVD Decrypter.
Jump to the DVD Decrypter tutorial by clicking Here
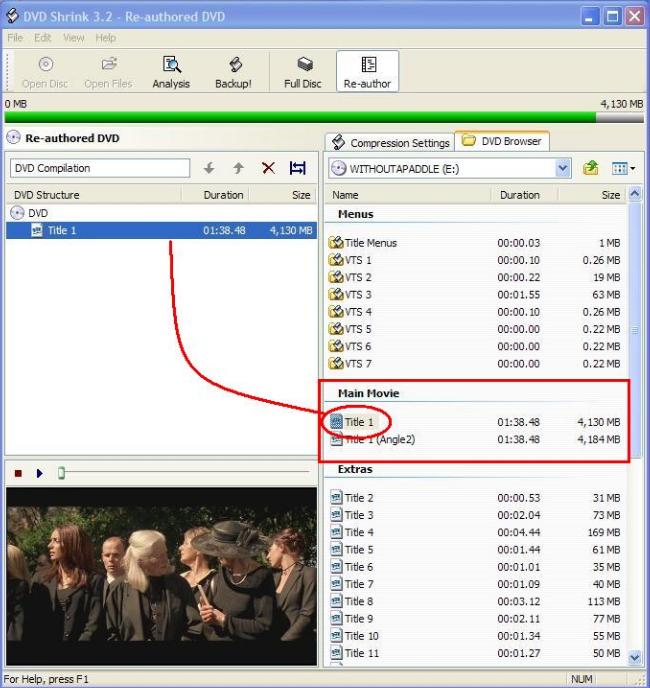
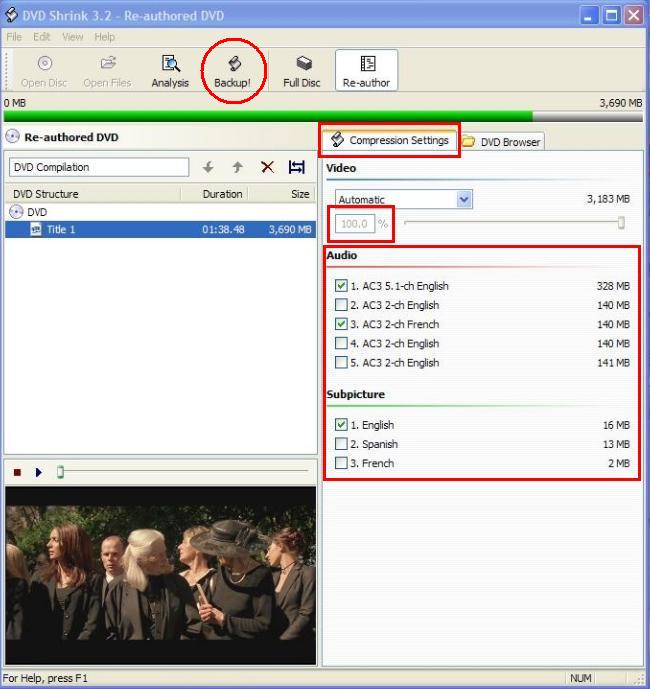
Once you've entered the Re-author mode you'll see something like the photo below, drag the first item under the 'Main Movie' section to the left side pane called 'Re-authored DVD', you should now see 'Title 1' on the left side pane.
Now we need to select the 'Compression settings' Tab, in this section you'll be able to remove any languages and subtitles you don't want to be in the final DVD. Uncheck all the boxes that you don't need and hopefully the movie will be at 100% which means no compression is required, if compression is required you will see the amount of compression that is required. Once your 're satisfied with the settings in this section click the 'Backup!' button to continue.
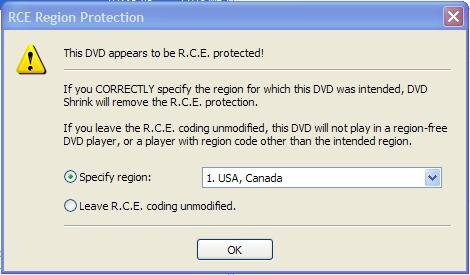
You may see a window like the photo below about R.C.E protection set the region to '1. USA, Canada' or the region that is applicable to your location and press 'OK' to continue.
Backup Settings
The next window will contain all the Backup DVD 'setting tabs' you need to simply check each 'Tab' against the following series of photos for the best settings to use.
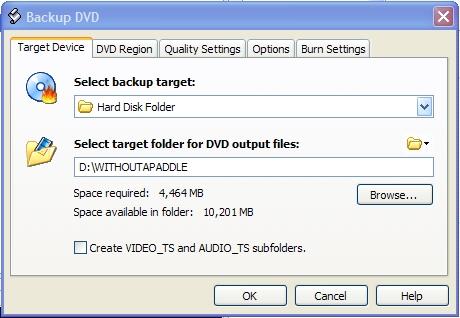
'Target device' should be a local hard drive, you can write an to a '.iso' image file or even write directly to your DVD-R but writing the files to your hard drive ensures you don't waste any DVD's and allows you to verify the finished DVD before writing for any errors. Choose the location and directory name to be used, don't hit the 'OK' button until you've checked the settings of all the 'tabs'.
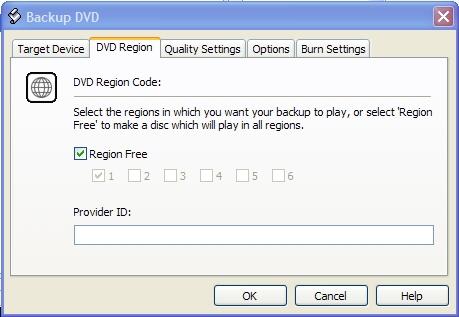
The 'DVD Region' tab should be set to 'region free' unless you actually want the DVD to not play in all regions, if that's the case check the regions you wish the DVD to playable in.
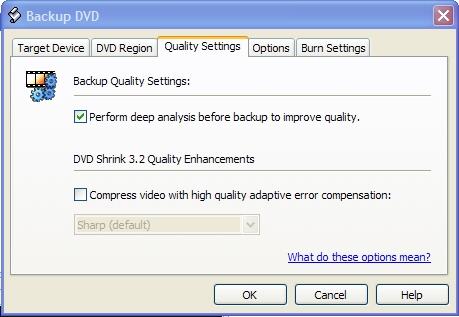
Under the 'Quality Settings' tab you should check the box where it says 'Perform deep analysis before back-up to improve quality'. Note this option will be grayed out if no compression is needed. The section titled 'Quality Enhancements' should be left alone as enabling it will cause the program to take 3-5 times longer to process and the difference in quality is neglible.
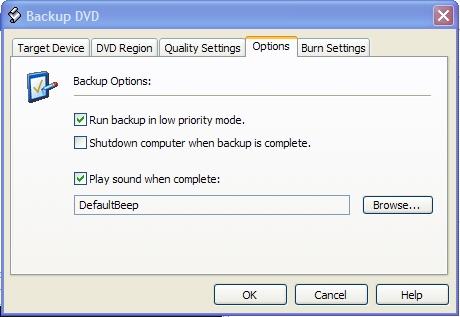
The 'Options' tab will look like the photo below and are best left at the default options, you are welcome to change them to suit your needs, if you decide to uncheck 'Run backup in low priority mode' you may see an increase in processing speed but at the expense of other programs not responding well.
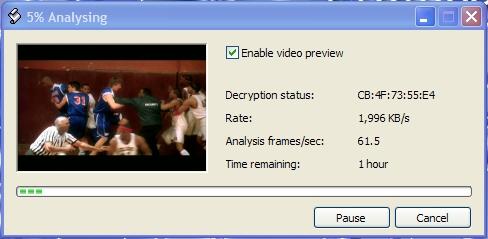
Next is the 'Burn Setting' tab but since you choose to put the files to the hard drive the options will be grayed out, not much can be done here. Now you can press the 'OK' button to start the whole process, if you choose the 'Perform deep analysis before back-up to improve quailty' mode and compression is needed you will see a progress dialogue box similar to the photo below. Here the program is deciding which frames will receive what level of compression based on the scene, this allows frames that need it to have less compression than frames that can be compressed more due to the content. This process can take 30-90 minutes depending on your processor speed.
Now the program will start the 'Encoding' stage and apply the settings it obtained from the previous stage to the files as they are copied to the destination folder you choose on the hard drive. This can take another 30-90 minutes, obviously if your DVD needed no compression it will be much faster. When the process is complete you will see a window like the one below.
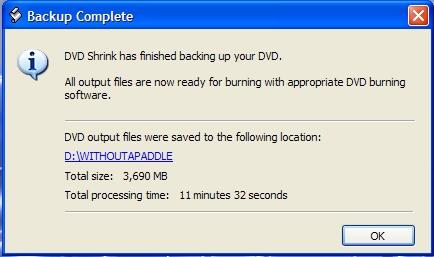
The directory where the output files were saved to is listed, click to be taken to your files. The next stage is to verify the files are correct and all the languages and options you've chosen are correct before burning the DVD to an actual DVD-R