
The $30 3D Printable Scanner Review
![]()
The $30 3D Printable Scanner
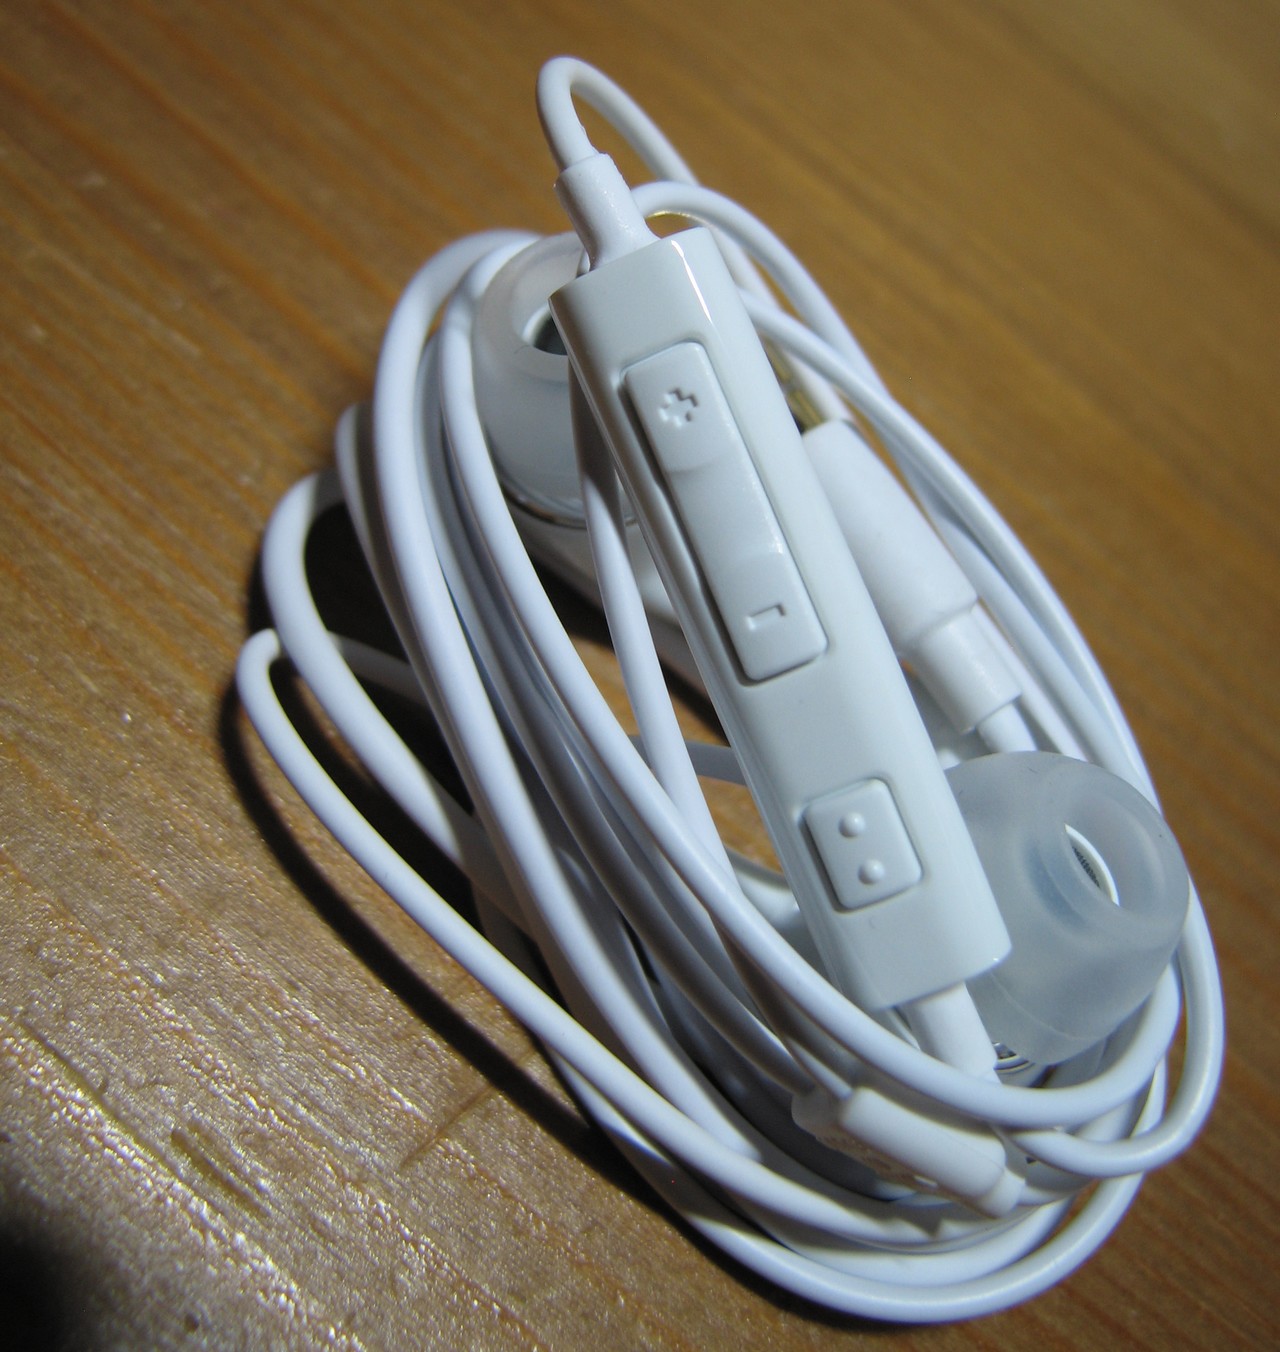
The $30 cost refers to amount of plastic needed to print the scanner and a set of headphones that will be needed to complete the project.
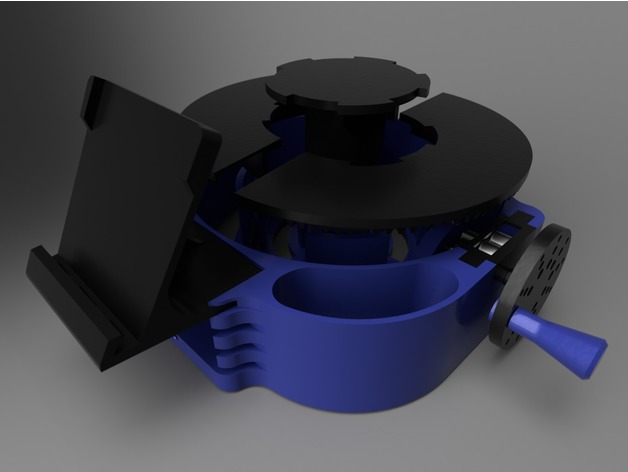
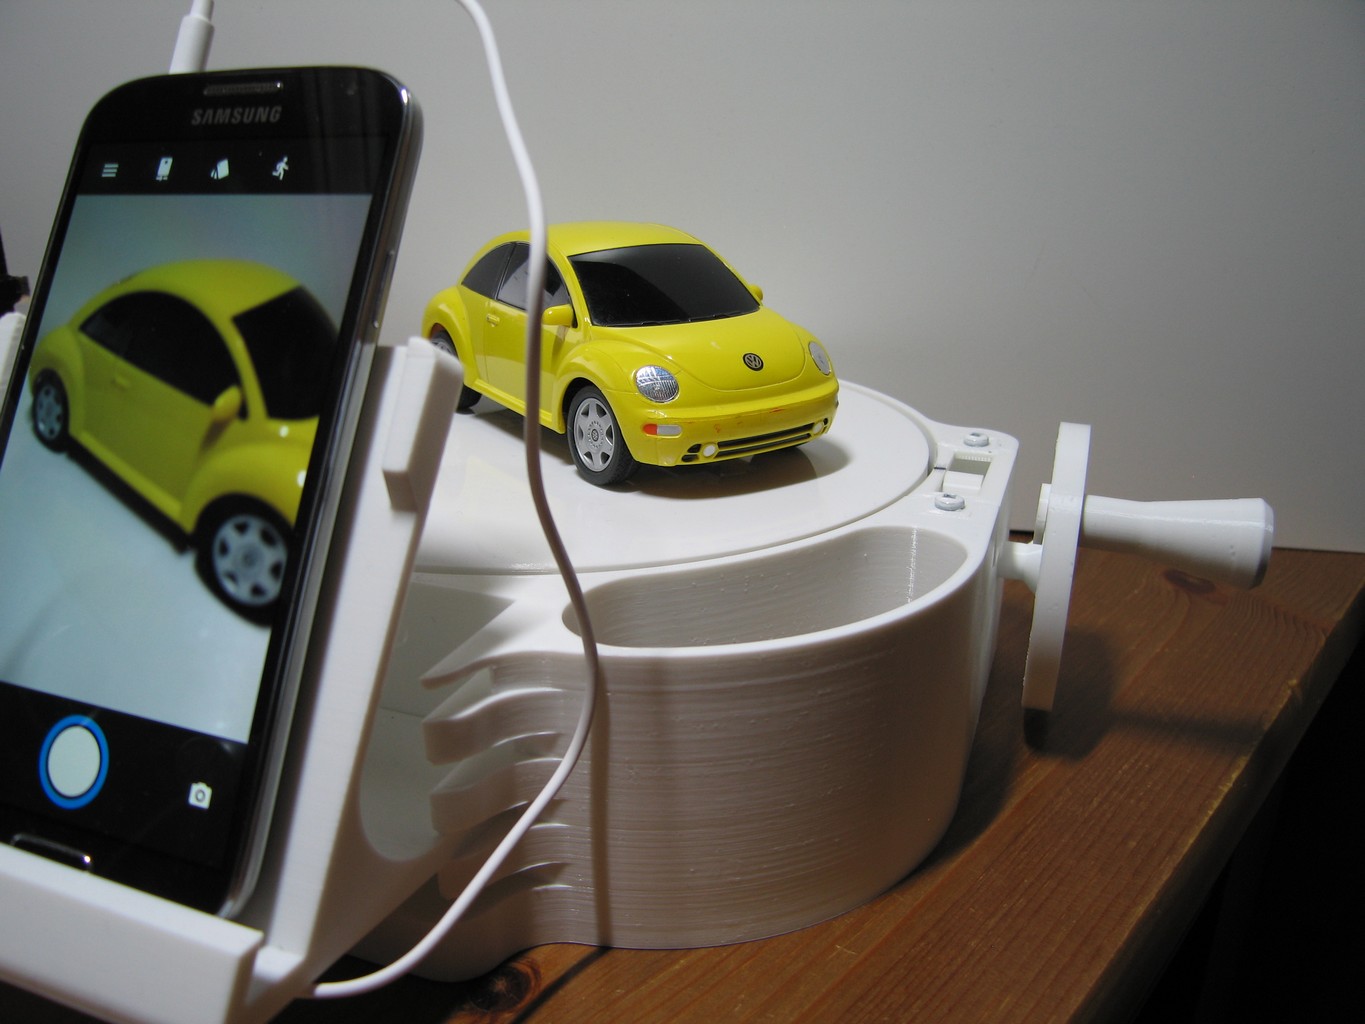
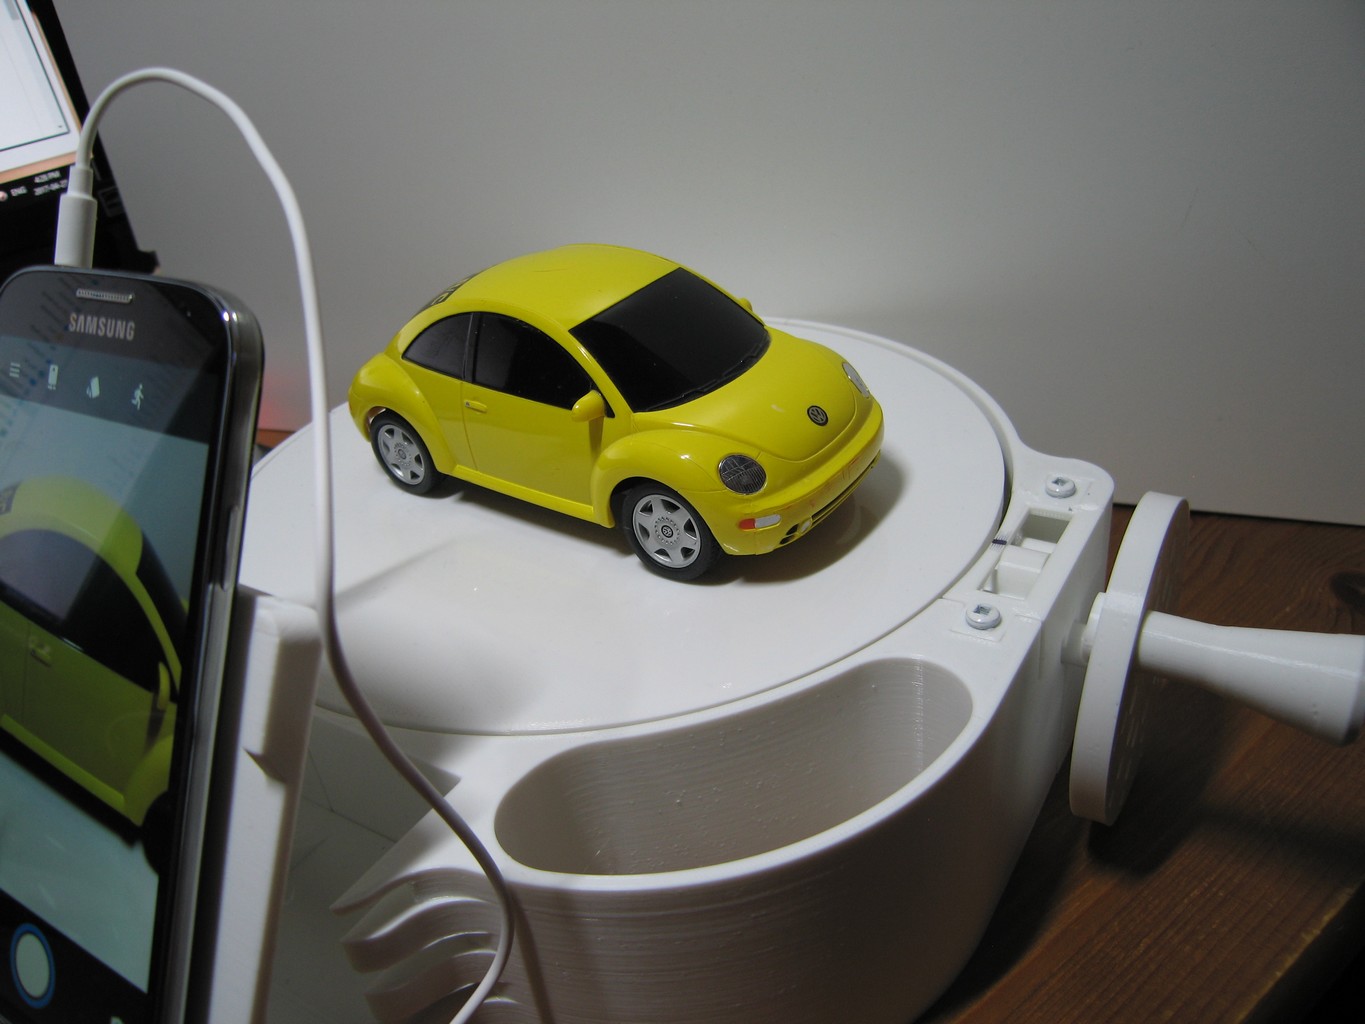
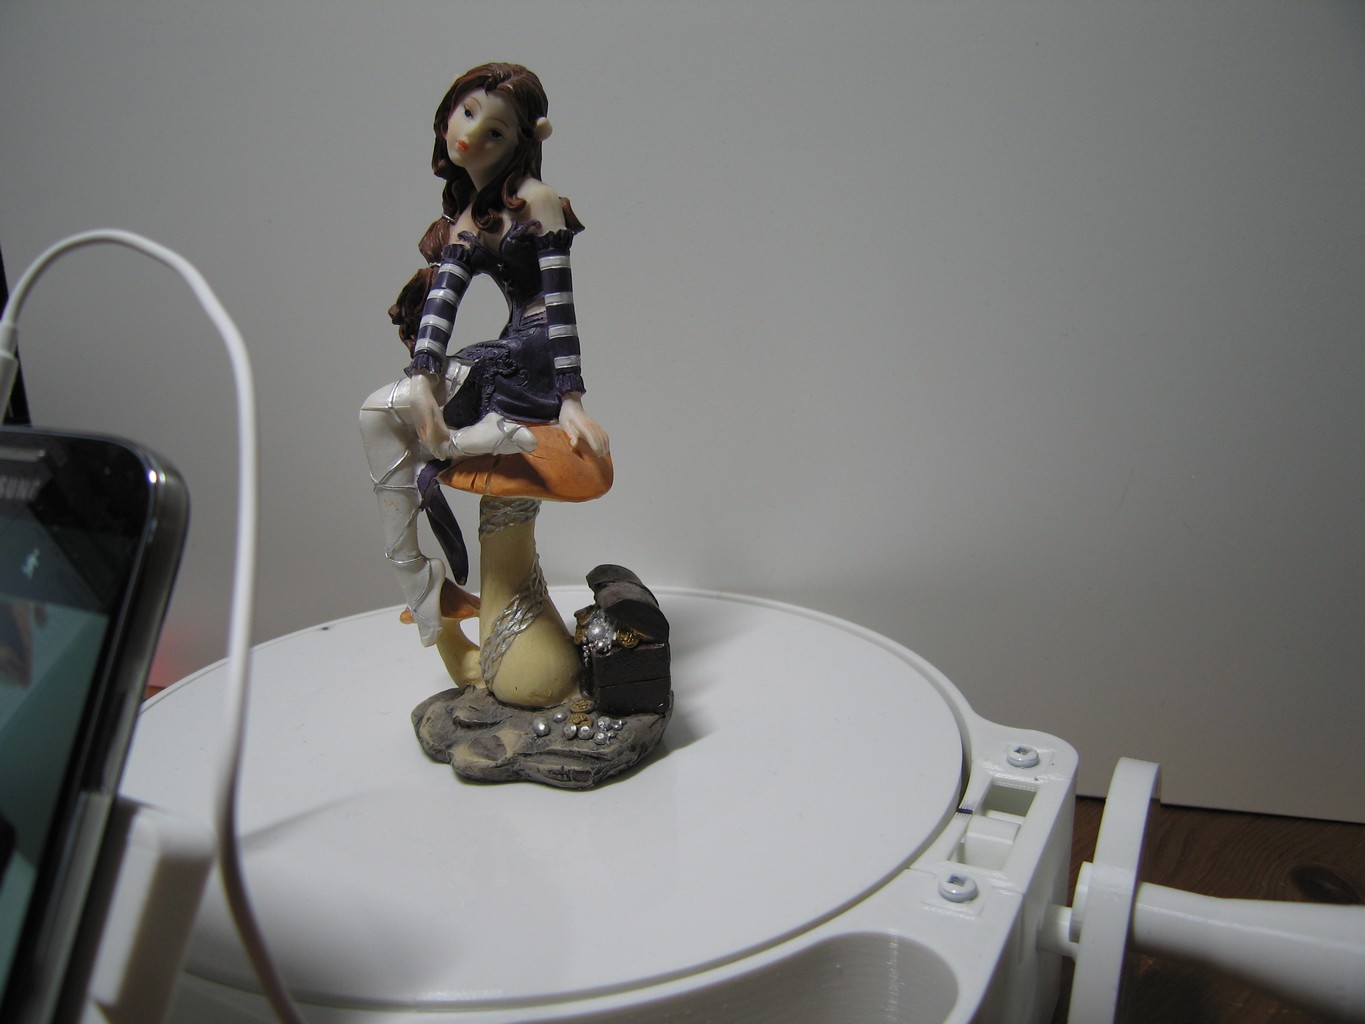
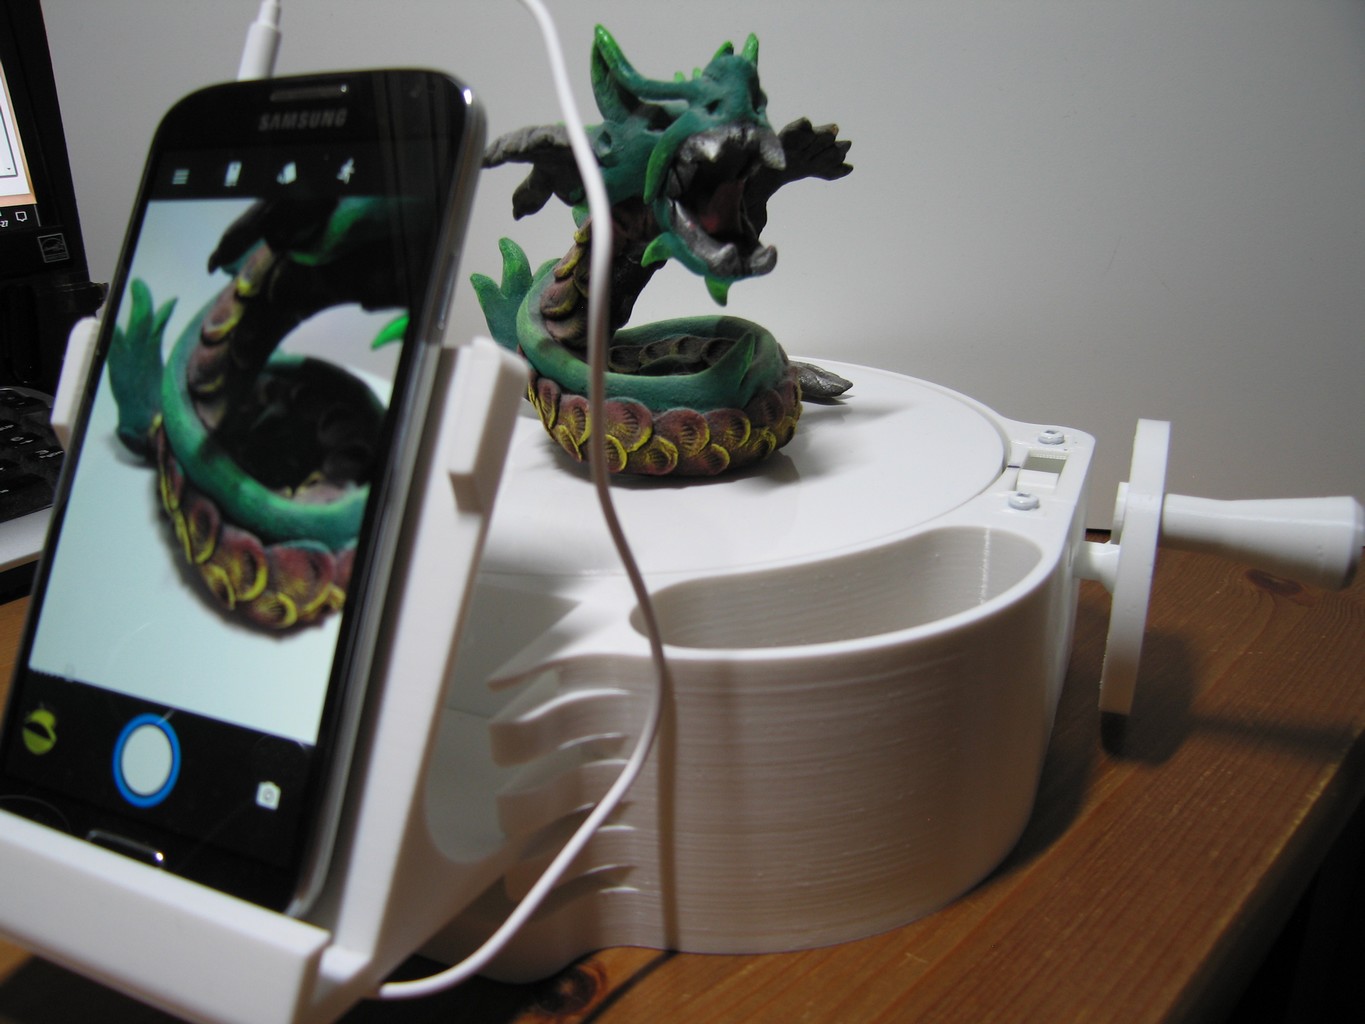
This 3D printed design will turn your Phone into a cheap portable 3D scanner utilizing the AWESOME Autodesk Remake software (other software is available more on this later). The idea is that you use your phones onboard camera to take the pictures while the turn table rotates. This is achieved by using your headphones that were supplied, The volume controller triggers the camera remotely, taking 55 pictures for every complete rotation of the turntable. Thingiverse has featured the scanner and for further information and printable files click Here
After printing the parts they assemble into a rotating platform as seen below. Any Apple or Android phone with a headphone jack will work with the scanner, I did have to fiddle around getting the volume Up control in the right position to trigger correctly but other than that it works really well.
 |
 |
 |
 |
 |
 |
You can do the exact same thing simply by using your camera and rotating the item to be scanned slowly between shots using a Lazy-Susan or other type of turntable. I plan to do this for items that are larger or taller than what can be used correctly on the printed 3D scanner. The camera on your phone will dictate what items can be scanned successfully simply based on the premise "if it doesn't fit in the view-finder it won't scan".
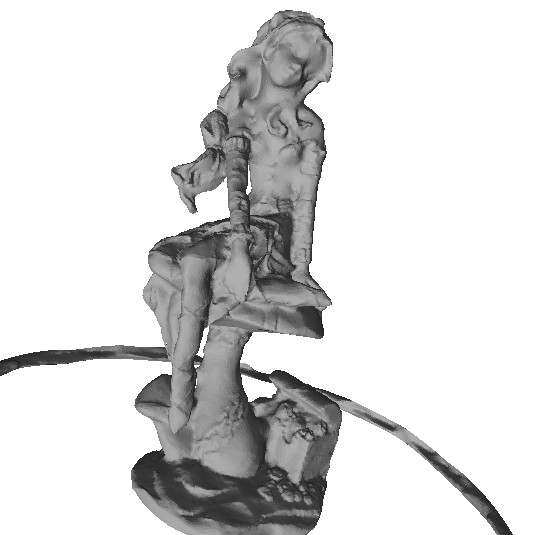
My very first scan worked amazingly well I used the same object that I was having issues scanning with the CowTech Ciclop scanner and the results can be seen below.
|
|
The scan did leave the top of the girls head with a large gap at the very top and a few minor defects, these can be fixed but I left them alone to show what a scan looks like before any tampering. Click Here to download the un-modified first_scan.stl file which can be viewed with your slicer software or try the free and easy on-line viewer www.viewstl.com |

If you didn't notice the free version of the Autodesk Remake software has limitations, mainly a limit of 50 photos vs 250 photos for the paid version and a limitation to 'Standard' quality (which is what the above scan was rendered at). Although this doesn't matter during the 15 day trail period it does matter afterwards.
Other software is available, some Open-Source and others costing less than the Autodesk software. I plan to try as many as possible to determine the best software to use for the lowest cost but for know here is the list that I am aware of that costs less than $300 or has a low monthly subscription cost:
- Agisoft PhotoScan - Standard Edition $179 USD (30 day trial)
- 3DSOM Photos to 3D Models - Subscription based (14 day trial)
- Insight3d opensource image based 3d modeling software (free)
- 3DFLOW 3DF Zephyr lite $149 USD (14 day trial)
- Regard3D opensource photos to 3D models (free)
You can also use Visual SFM and Meshlab or Blender to create the 3D scan, all are opensource but require a bit more work than the above semi-automated programs if you wish to try this method a video tutorial is available Here
After installing and testing the above software (using the same set of 50 photos for each program) the winner in my experience is the free version of Autodesk Remake. Remake has the easiest interface and produces excellent output with almost no user input or changes to the default settings. It does this in the cloud so no resources are needed on the local PC other than a Internet connection to upload and download the processed file. Typically it takes 15-20 minutes to get the finished output. Remake also works with any photos unlike Regard3D it needed to know focal length and it was not provided with a Photos from my Phone. I did take some photos with my old Canon S70 camera and Regard3D worked fine with these photos. I'm not saying the other programs are inferior just that they require more knowledge and experience with creating output from photos. Many have very advanced interfaces that offer so many options it's hard to choose or figure out what they mean! Autodesk Remake produced great output.
I achieved even better output with fewer than 50 photos, I took 22 photos at lowest height of the object and another 22 photos from a higher angle more above the object. The completed 3D Scan was complete and had only a few minor holes in the mesh to repair. Remake provides tools within the software to fix these holes along with deleting areas that were captured in error.
I will also mention proper indirect lighting that creates as little shadows as possible on the object and background helps enormously. Also I placed some white material around my photo capture area and used some as the backdrop this also helps obtain a great 3D finished Scan.
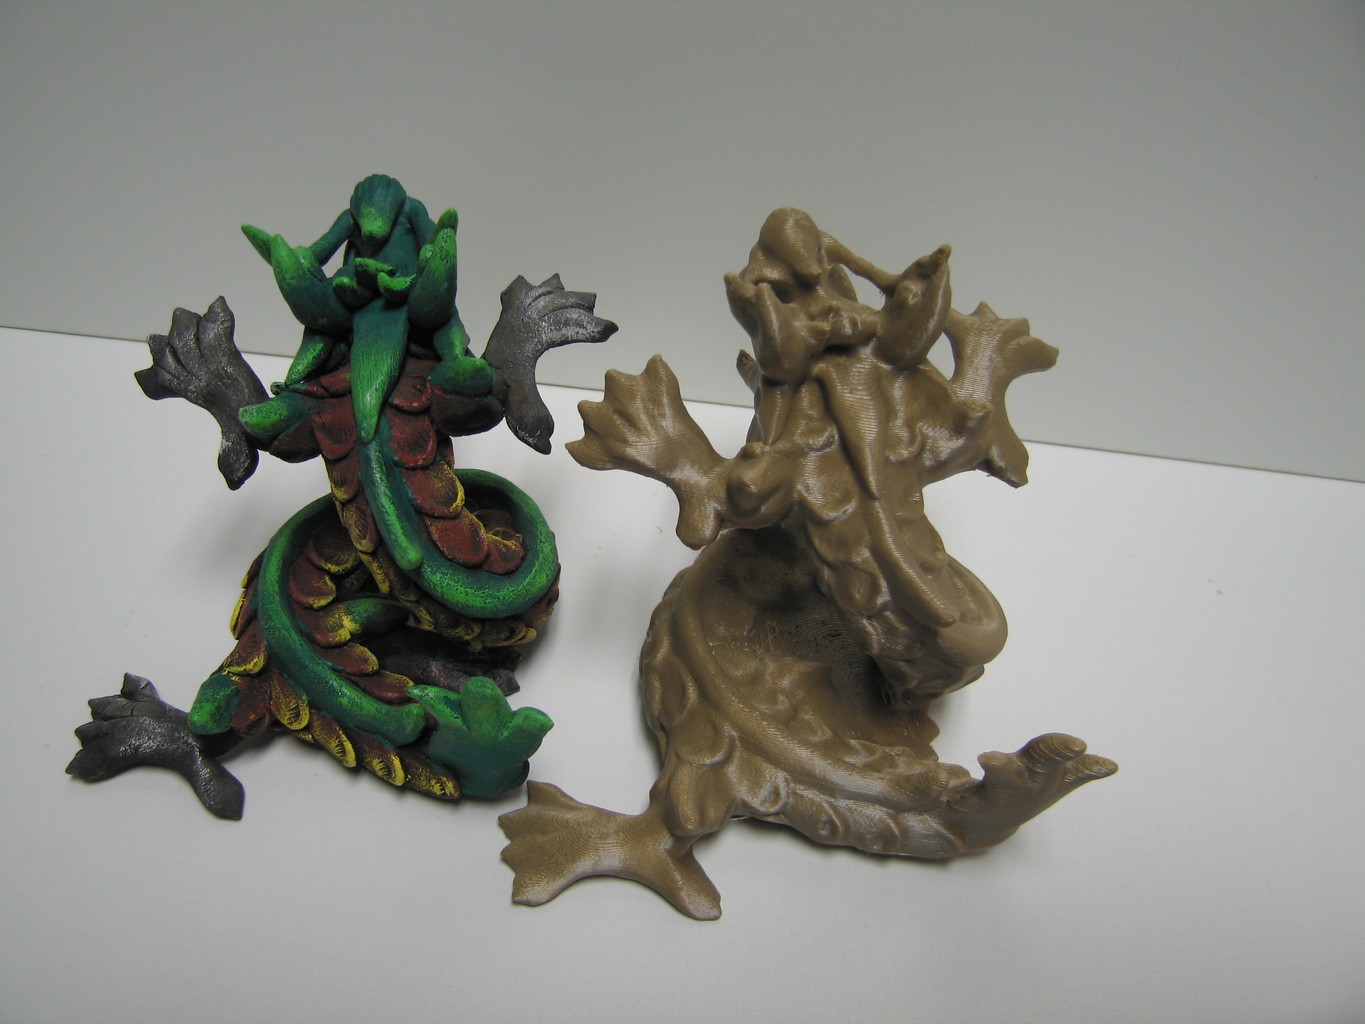
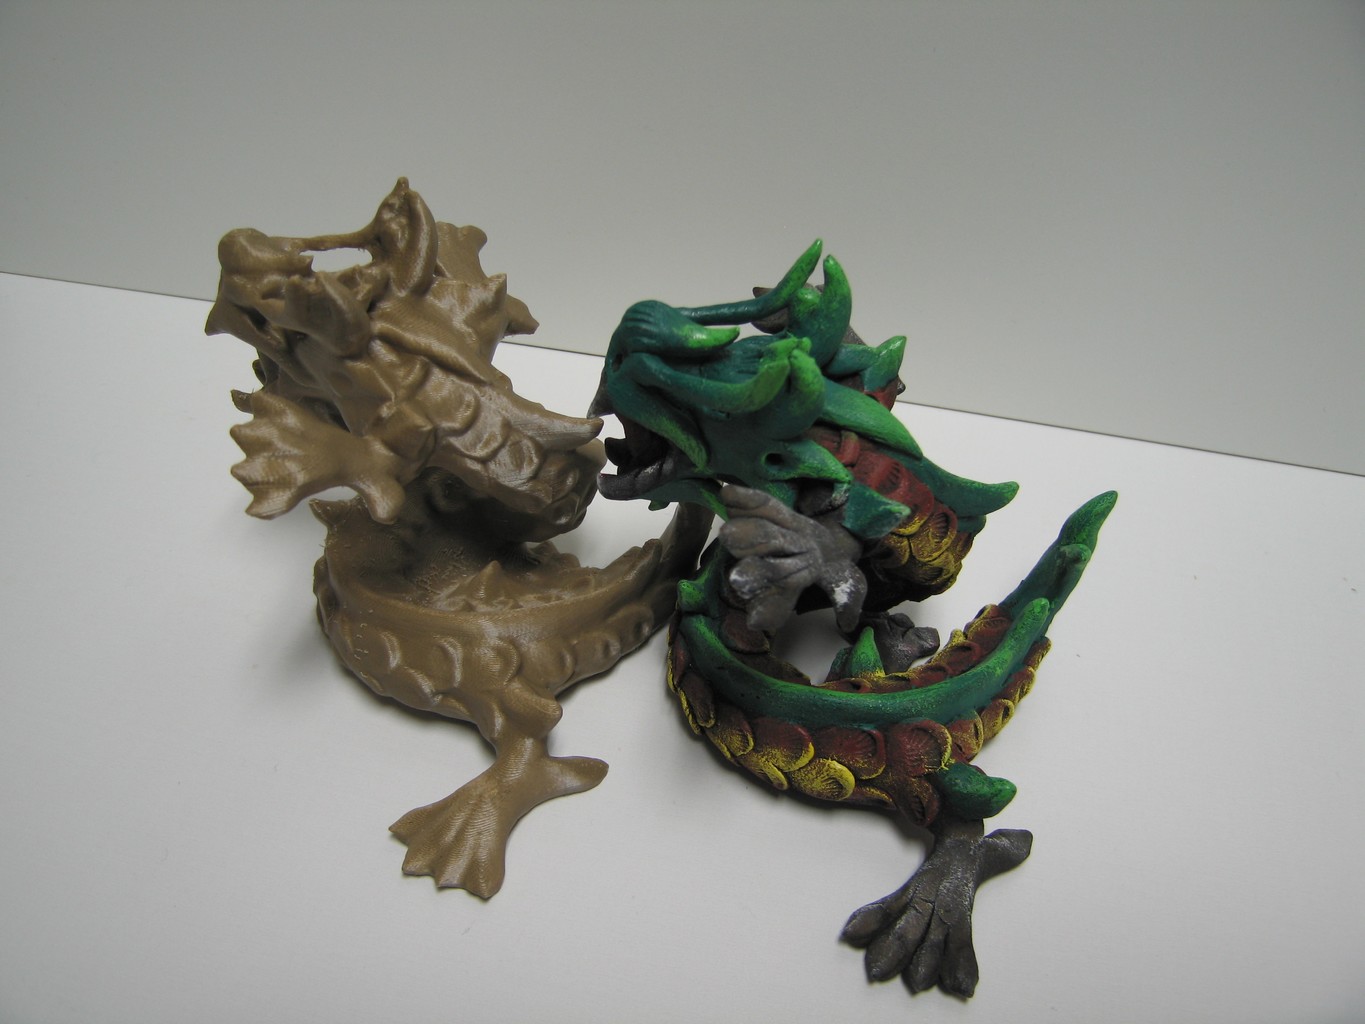
Below is my first attempt at scanning a Dragon and the finished result printed at the same scale it does have a few issues with details and the inside foot turned out attached to the base which is an error. I have ordered a "Light-Box" and this should help with capturing details without shadows interfering. I will update this page with the final results using the Light-Box assuming the scan improves.
 |
 |
 |