
The $30 3D Printable Scanner Review
![]()
New Matter Mod-T 3D Printer Review
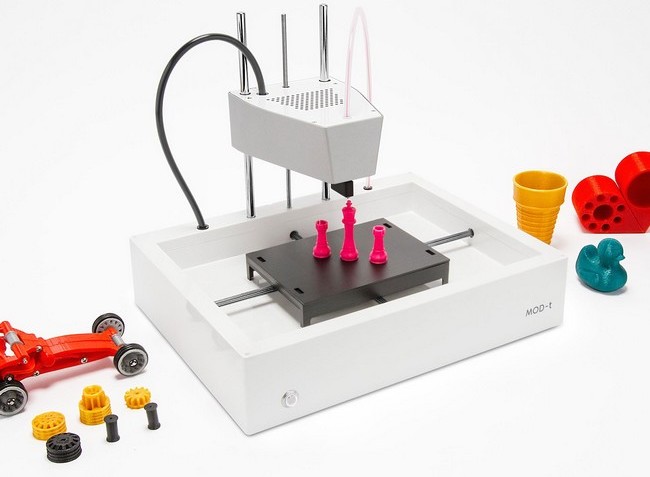
When I first encountered the New Matter MOD-t 3D Printer it was July 2014. This 3D printer was in the middle of an Indiegogo funding campaign. I had been interested in 3D printing and watching the development for a while but all of the other 3D printers available at the time were fairly expensive machines. Many had to be built and the only models under $500 all seemed to be other possible Kickstarter/Indiegogo campaigns.
New Matter promised many things for the Mod-t at a mere $250 and the first batch of backers paid only $149 for the Mod-t. I was a little late but managed to secure a spot at the $200 backer price. The proposed retail price for the Mod-t was set at $250 after the campaign. The retail price ended up actually being a little higher coming in at $399 (all prices are in US dollars) which you can order directly from New Matter or even BestBuy, Amazon or ToysRUs
 |
Fast forward approx 1.5 years to November 2015 and my 3D printer had arrived at my doorstep! I smiled like a little kid on Christmas morning and grabbed my box and heading downstairs to un-box my new toy! Setting up the printer was an interesting although fairly easy experience as the required USB cable is included along with a quick setup guide. |
 |
Basically you connect the printer and install the New matter desktop software which is available for both PC and Mac users. if a newer firmware is available for the printer you will be prompted to upgrade the firmware. Using the utility you set-up your wireless network and once connected you can disconnect the USB cable as you won't need it again (well technically you won't more on this later). Unlike most other 3D printers your only method of interacting with the printer is through New Matters web-based printer portal and a single lighted power button that can be pushed to achieve a specific function. |
Lets get the basic features and Specifications out of the way.
- Ready Out of the Box - Comes with 1 free spool of filament and all the tools you'll need
- Wi-Fi Enabled - Select, customize, and print wirelessly from your phone, tablet, or desktop.
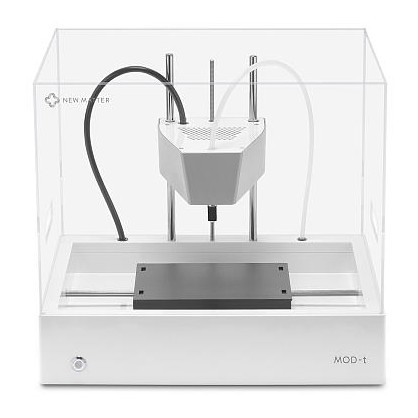
- Quiet and Safe - UL certified for safety. Clear cover protects your prints and reduces noise.
- Eco-Friendly - Prints with PLA, a biodegradable material available in an array of colors.
- Free Designs - Print any of the hundreds of free designs unique to the MOD-t or select one of the thousands of widely available designs.
- Prints using Non-proprietary PLA filament, 1.75mm diameter
- Build Volume is 150 x 100 x 125mm (6 x 4 x 5in)
- Layer Resolution Software selectable from 0.05 to 0.4mm
- Nozzle Diameter is 0.4mm
- Connectivity Wi-Fi (802.11 b/g/n), USB 2.0
- Printer size is 383 x 340 x 295 mm and weighs 5kg (11lbs)
- Supports Mac OSX 10.7+, Windows 7+ (required for setup only)
- Files supported are .STL, .OBJ, & gcode
- Ships with:
- a Scrapper
- Spool Holder
- Filament spool of 1.75mm Pink PLA (.5Kg)
- Utility Cutter
- Metal Bristled Brush
- Clear Cover
- USB Cable and set-up Instructions
- Power Supper with AC Power Cord
- Print Surface (more can be purchased form the New Matter store)
- Print tray
Firmware, Firmware and more Firmware.
I admit being the first on the block with a new just released 3D printer was not exactly painless, New Matter released a flurry of firmware which attempted to fix issues and finally enable features promised but not yet implemented. The side effect of some of these updates was new issues, at times it was so bad some printers stopped working. I regularly had to recover to an older firmware just to enable printing again. Printing from the web-based portal was often pointless and resulted in prints stopping half-way for no reason. basically I had to learn to use a slicer (Cura) and produce gcode which I then sent via USB to the printer to produce any reliable prints.
With the last firmware update which was Firmware 0.14.0 released in June 2016 all of the above things I mentioned were fixed and even features such as Pause printing and the broken/empty filament detection were working along with wireless printing through the web-portal with no issues.
Print Bed Tray/Surface Leveling and Print Issues.
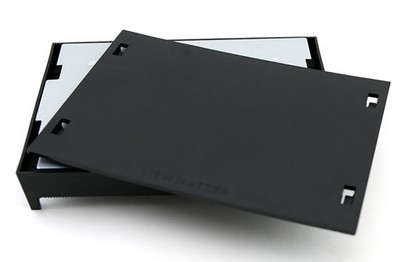 |
The removable print surface is a first, it simply slides onto the Print tray. This allows you to remove prints easily by sliding off the base and bending it slightly to release your prints. While the concept is great it has two main disadvantages. The first issue is that the print surface is held only by friction and will eventually slide a little and ruin your print. I had quite a few ruined prints due to a misalignment of the layers as the plate slipped, I started to overcome the problem by taping the surface into place but found a much more effective solution, I printing out some 'MOD-t printing bed clips' which once installed fixed it for good! |
Also the Build surface is supposed to last for 'many prints' if you follow this advice 'Care for your print plate by using the scraper to remove residual filament and the wire brush to prepare the surface between each print.' I found that using Painters Blue masking tape on the build plate works 100% of the time, is easily removable when needed and PLA sticks to it really well. I would recommend using the tape from the begriming you'll never need to replace the build surface, only the tape once it wears out!
All 3D printers use 3 different movement types to produce a print these are known as X,Y and Z.
Z usually refers to the up/down motion of the printer head in relation to the print, X and Y refer to the side to side and back to front motion of the print head. What makes the Mod-T unique is that it is (currently) the only printer I have seen where the X and Y are 'notched' rods and the Print bed meshes and slides along these rods to cause the print bed tray/surface to move.
One of the most difficult things about 3D printing is 'Bed Leveling' and the Mod-t does not ever need have anyone perform this task as the X and Y Rods are leveled from the factory. The next issue in 3D printing is setting the 'Z start height' other printers require the users to fiddle with settings to figure out at what height the Print-head should be over the build surface to successfully allow enough room for the plastic to flow but tight enough to get the first layer to squeeze out and stick to the print surface. Mod-t does an auto-calibration based on 'Force feedback' of the motors. The first time you see it in action is rather neat, the user places the 'build tray' in any corner of the printer (corners are best to make sure the print tray is sitting perfectly straight on the X and Y rods). Once a print is started the tray will slowly move back and forth and eventually side to side to figure out where the Build platform is and move to the center of the build area. The print tray will then cycle side to side continually as the print-head slowly lowers towards the plate, when the print surface rubs on the hot-end nozzle the system detects this as requiring more force to move the print tray, it adjusts the print head up/down until it detects the correct amount of drag to set the correct 'Z start height'. It seems to work flawlessly as I never had any issues getting the first layer to print correctly
Using the Web-based software vs. a slicer and gcode.
Deciding which to use simply depends on the amount of control and the simplicity desired. Do you want to print items that will almost always turn out with no issues and use a simple web-based interface to connect and print to your printer, the only question asked will be do you want good, better or best quality? Then using only The New Matter store is the easiest and best way to print, it's simple there's tons of tested designs and almost anyone can select and print.
I you want to print stuff from other places like Thingiverse, Pinshape or other 3D designs then the answer is a little more complicated. The New Matter portal does support the uploading of any .stl or .obj files you might want to print but you may need to adjust size and/or orientation then rotate them to get the best possible chance of printing the item. As I found out the hard way items you find are not always set-up in the best orientation for printing. The item may also need 'supports', these are a thin printed and removable (after printing) structures to help with problems when a section is steeper than a 45 degree angle. Also supports may be needed when 'Bridging' these are sections like a bridge where the plastic needs to travel across a 'bridged' area to connect to the other side. If your new to 3D printing then you will need to experiment with the file settings and this may take a a few tries before you get things right. The web portal will allow you to do some of the things needed but you loose some control in favor of ease of use for the end-user.
Cura is the slicer used (but not seen) by the New Matter portal and you can simply download it yourself which will allow for much more specific control on the finished gcode file. Slicing software literally takes the 3D object and 'slices' it into very thin 'slices' that the printer can print, each slice is described as gcode. G-code is a language that we use to tell the printer where to move, how fast to move, and what path to move. You will need to set-up a 'Profile' that gives the slicer the needed information about the type of printer being used, I used the one Here and it has set-up instructions.
Printing directly from gcode requires you use a USB cable, simply load the desktop app you and send the gcode file to the printer by uploading it.
Printer interface (or lack of.)
The printer has a single power button with a LED ring that is either solid or blinking depending on the state the printer is in. Send a file it will blinks slowly to tell you it's getting the file, fast blinking means push me I'm ready to start, during a print a single press will pause the print (to change filament) and another press will continue the print or you can hold the button for a longer period and this will cancel the print. All other information is only available through the web portal or desktop app. Things like hot-end temperature and the percentage printed/left or the ability to load/unload filament.
While not an issue from a simplicity stand point it is odd when most other printers have a LCD display with a jog dial to see what's happening and to change things while printing if needed. Mind you the lack of these type of features is how they mange to keep the costs low enough to sell for $399.
Thankfully making the Mod-t as simple as it is means practically anyone can mange to print great items with no knowledge of what's going in in the background, i was forced to learn most of these things due to early firmware issues and such so I can appreciate the simplicity of the web portal.
How well does the Mod-t Print?
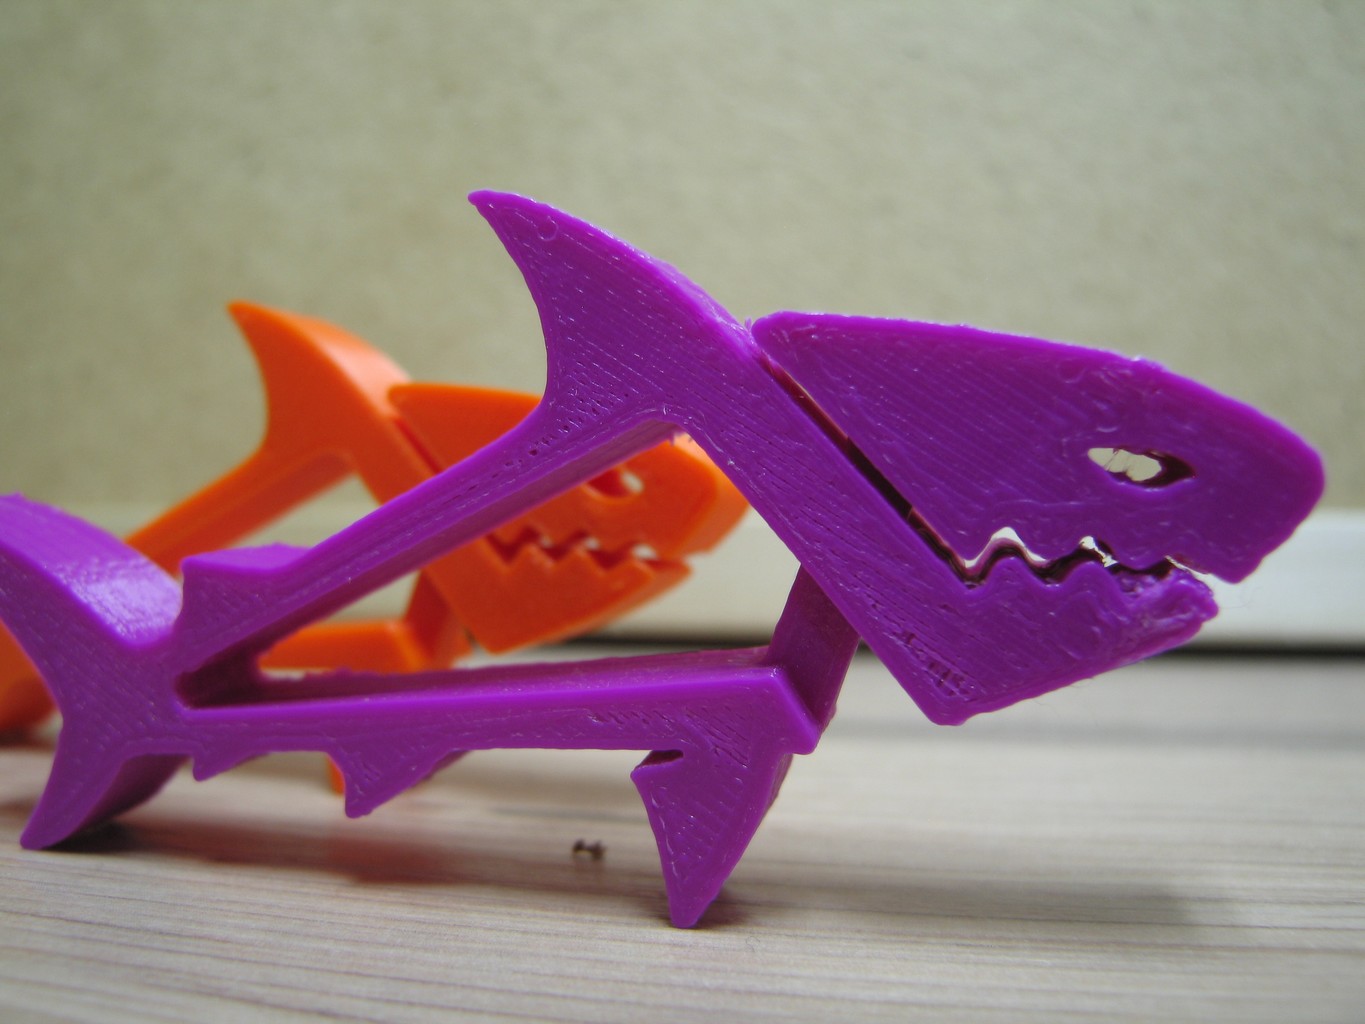
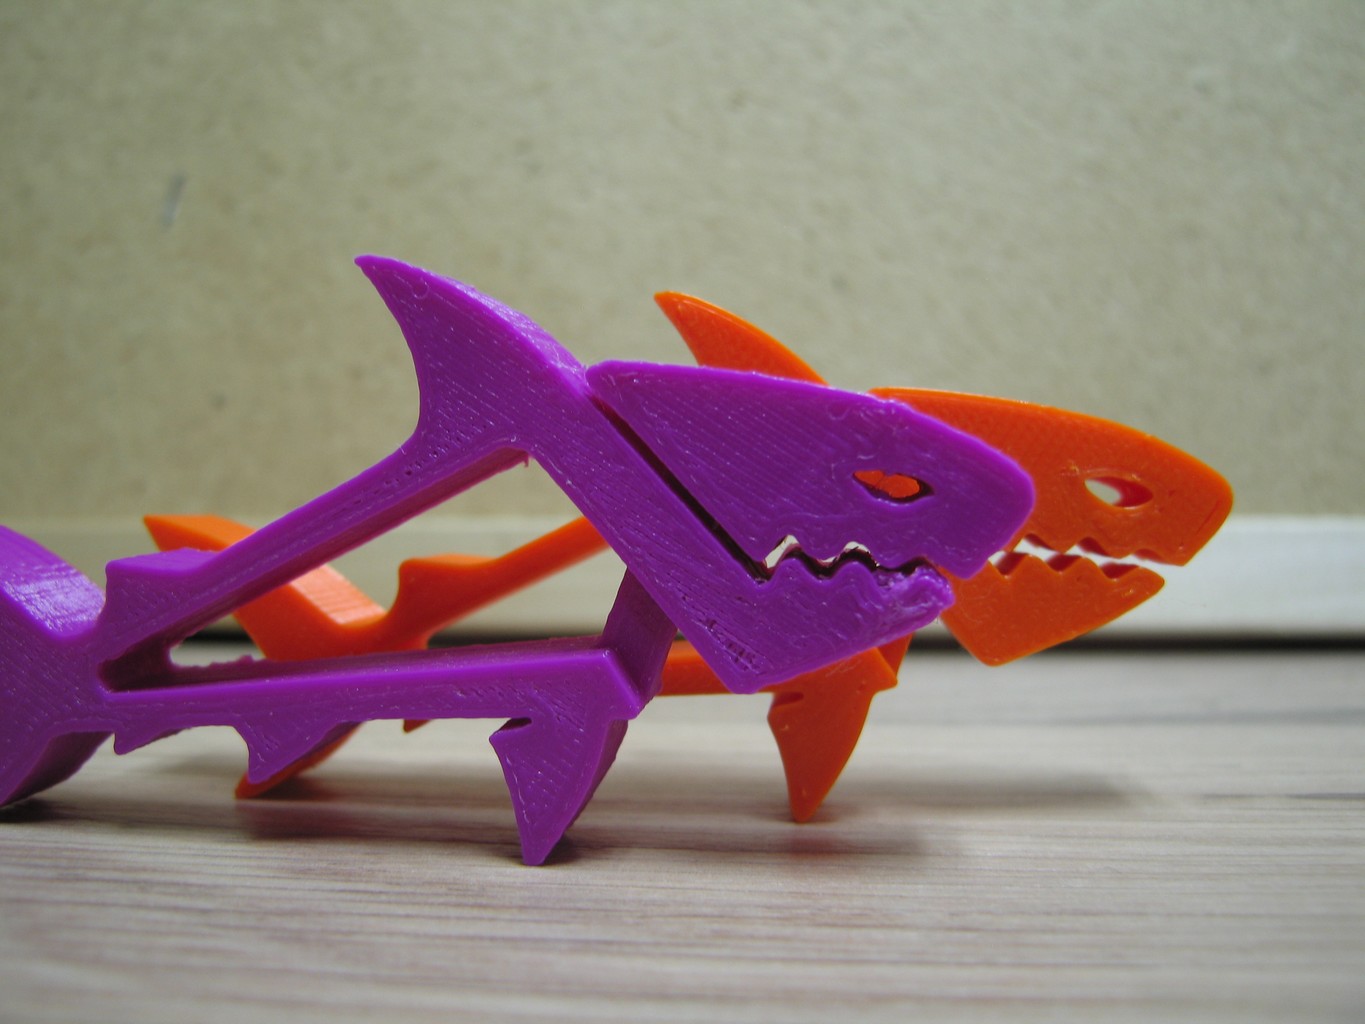
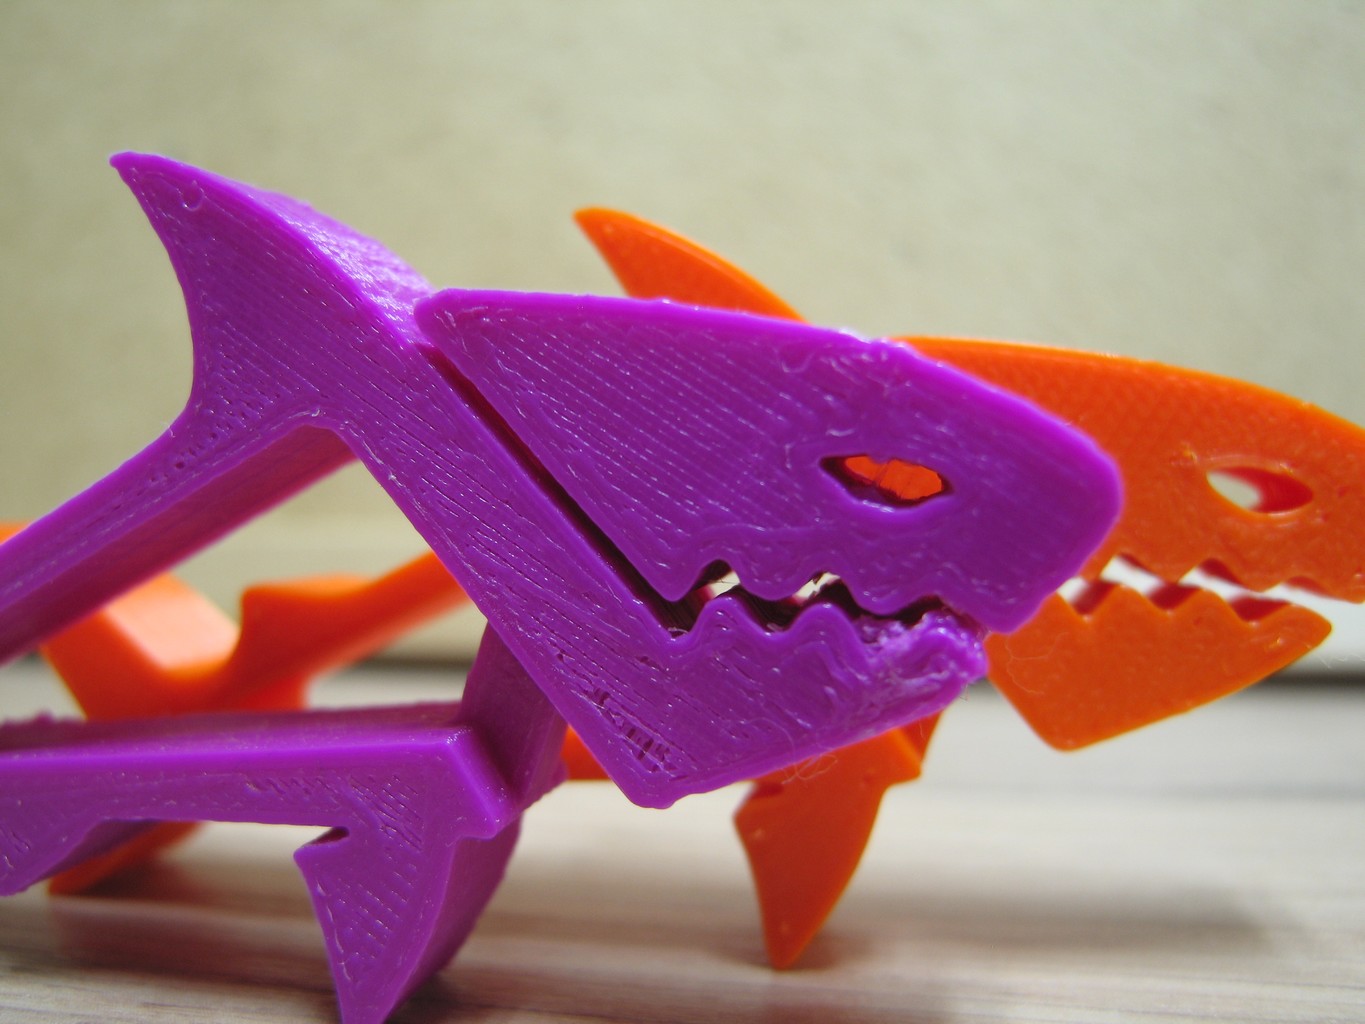
In my opinion prints come out very good I was actually very surprised at the quality of the prints! Certainly at this price range you won't have any reason to complain, the detail is as good as you can get with a .04mm nozzle and the .01mm resolution range ensures pretty good looking prints. have a look at the sample I printed below, click on any picture to enlarge (item is Sharkz on Thingiverse)
 |
 |
 |
Hot-end is user replaceable and that is a good thing!
|
My particular unit went through 3 Hot-ends while I had the printer, they simply stopped heating up. I did use it as much as I could and it was printing almost 24/7 but Hot-ends should last a lot longer with no issues. They were all replaced by New Matter at no charge but they do recognize they have an issue and are working on fixing the problem. |
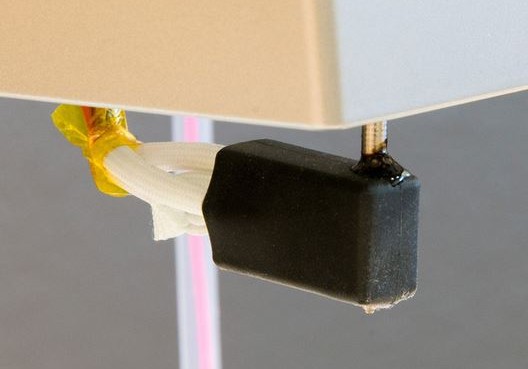
The Hot-end is really just a block of aluminum with a melt chamber and nozzle attached, it uses a heater cartridge and a temperature sensor to help it maintain a specific temperature. The Mod-t supports 160°C to 220°C which is great for PLA as most other plastics need a higher temperature to melt properly. The main issue preventing the use of other plastics is the fact the Mod-t doesn't have a 'Heated bed/build surface' PLA sticks to the build surface of the Mod-t fine but other plastics will not.
Replacement of a Hot-end is very simple you unclip the wire harness use the included wrench to hold the nut above it and unscrew the hot-end, installation is just as simple. I only mention this procedure as it's also needed when you have a unsuccessful filament load/unload issue. I had many issues with the load/unload process mostly with the unload process failing to extract the filament but a failed unload usually leads to a failed load cycle. When this did happen you have to remove the hot-end to access the filament stuck in that area and remove it. The latest firmware does fix many of the issues with the load/unload cycle but it still appears to be a thorn in some users sides according the New Matter support area.
Final words and thoughts
New Matter sells 1.75mm PLA in various colors and you can order spools from other venders and they should work fine with the Mod-t but I did notice that other venders seem to use different spool opening diameters. I ordered some Hatchbox PLA and it would not fit on the provided spool holder. So I looked around on Thingiverse and printed a new one, the ability to solve my issue by using my 3D printer to print a new spool holder shows a hint of how useful they can be!
The Mod-t is perfect for a student or someone simply who wants to experience 3D printing without the hassle of slicers and gcode, it produces great prints with no issues, assuming you use the tape and bed clips mentioned earlier. Currently for the price you will hard pressed to find any other printers that can compare on the simplicity side period. The Mod-t is a great inexpensive printer to join the true 3D revolution!
When you are ready to start printing with more types of Plastic such as PETG or ABS then you'll need to invest in a more capable (expensive) printer such as the e3D BigBox. I did eventually sell the Mod-t as I was interested in printing larger objects with other types of plastic but the Mod-t taught me a lot and helped prepare me for the jump. I never regretted purchasing the printer and I'm confident that if you decide to purchase one you won't be either. Remember 3D printing is by nature complicated and many things will/can go wrong it's not an exact science. All 3D printers will have unsuccessful prints due to issues with support, bed adhesion, tangled filament, slicer configuration, user error and prints snagging on the nozzle and getting bumped out of alignment. This is where the Mod-t really shines when using the New Matter store as these prints have been tested and adjusted to print without issues.
Other reviews on the Mod-t will mention that PLA only and no option for ABS or a heated bed as negatives but they are only negatives if you need these and with some more advanced versions of PLA on the market such as eSun's Advanced PLA+ or Proto-pasta High Temp PLA you can still print these without a heated bed and the current hot-end on the Mod-t which will take care of the reasons someone may wish to print with ABS. See the section below on PLA vs. ABS and Advanced PLA+
PLA vs ABS and Information on Advanced PLA+
PLA or Polylactic Acid is a bioplastic derived from starch-rich renewable resources such as corn, sugar beets or tapioca root. The raw material of PLA is non-toxic, biodegradable and bio compostable.
ABS (Acrylonitrile-Butadiene Styrene) is an oil-based plastic.
PLA is more brittle and has a higher surface hardness. It is more prone to break when bent. Objects made from this material can be cut, filed, sanded, painted, and bonded using adhesives
ABS is stronger and more impact-resistant. Therefore, it is better suited for mechanical parts and for objects that need to be weatherproof. ABS parts are more flexible than PLA parts and tend to bend rather than break when under pressure.
Advanced PLA+ is superior than all PLA on market, newly added mixes are also bio-polyesters and the the PLA+ is still 100% biodegradable the major differences between PLA+ and regular PLA are:
- Elongation At Break: PLA+ 29% vs Regular PLA 5%
- Izod Impact Strength: PLA+ 7KJ/m2 vs Regular PLA 4.2KJ/m2
PLA and most plastics need to stored in a clean dry environment, I suggest ziplock bags with a packet of desiccant to help avoid 'water absorption' PLA is known to absorb water from the air rather easily and it will eventually cause printing issues if the amount of water absorbed gets to high. You can use a Filament Dryer to help reverse the process but proper storage will avoid the issue entirely.